Using TeamViewer QuickSupport for remote assistance
Applies to: TeamViewer, version 11 and greater
TeamViewer QuickSupport (TeamViewer) is a free program used to provide remote support for computer problems over the Internet. As such, it can be a more convenient alternative to arranging an in-person visit for many computer issues.
This guide describes how to download and run TeamViewer in order to initiate a remote support session.
Arrange a remote support session
Before you can download TeamViewer and join a remote support session, the first thing you will need to do is arrange a time for your session to take place. The best way to do this is often to talk to a technician you trust.
Warning
For your security, we will not initiate a remote support session without explicit permission. If someone you do not trust contacts you offering remote support, you should decline. You should also decline if you are not requesting support. Allowing unsolicited remote support sessions risks the safety of your computer, of your information, and of your identity.
Use TeamViewer on Windows
Download and run TeamViewer
Prior to beginning your remote support session, you need to download and run TeamViewer.
To download TeamViewer, click here. You can also copy and paste this link into your web browser: https://mtz.gr/teamviewer.
Info
The next two steps are for Google Chrome only. Different web browsers may ask you to either Save or Run the file. If asked, you should Save the file, and then move it to your Desktop.
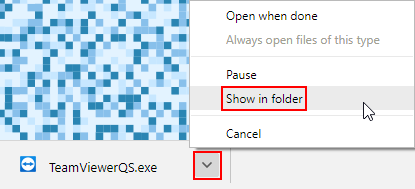
After the download finishes, locate it in the bar at the bottom of the window. Click the arrow to the right of the file name, and then click Show in folder.
Move the file out of this folder by dragging and dropping it onto your Desktop. Close the folder window If desired.
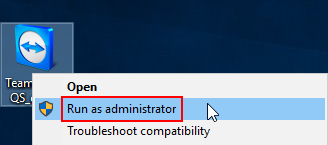
On your desktop, right-click the downloaded file. Click Run as administrator.
Click Run to accept the security warning.

If a User Account Control window appears, click Yes, and provide an administrator password if needed.
Establishing a TeamViewer Session
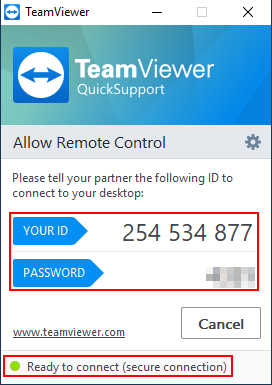
The TeamViewer window will now appear. Note the green light towards the bottom of the window, as well as the status, "Ready to connect (secure connection)." This indicates that TeamViewer is now able to accept an incoming remote support offer.
Make a note of your ID and the four-digit temporary password (obscured), which the support staff will need in order to securely connect to your computer.
Once the support technician has this information, they can take temporary control of your computer. You will be able to see every action they perform. This typically includes seeing the mouse cursor moving, and seeing programs opening and closing. While the technician has control over the mouse and keyboard, you can still override their actions by using the mouse or the keyboard yourself. This is useful when replicating an issue for support staff to resolve, and when you need to enter a password.
If you want to stop a support session in-progress, close TeamViewer. Your technician can also end the session at any time.
Once the remote support session is over, TeamViewer will automatically return control of your computer to you.
Always close TeamViewer once your remote support session is finished. This ensures that no one can access your computer remotely unless TeamViewer is opened again.
Sponsored sessions
When the support session ends, you may see messages promoting the paid edition of TeamViewer. These often appear as a sponsored session message. TeamViewer shows these messages at random because we can provide remote support at no cost to you.
If you see any promotional messages, you can close these windows and continue using your computer, with no further action required.
Use TeamViewer on macOS (OS X)
Download and run TeamViewer
Prior to beginning your remote support session, you need to download and run TeamViewer.
To download TeamViewer, click here. You can also copy and paste this link into your web browser: http://go.nerdoncloud.com/teamviewer.
Depending upon the operating system and browser you use, you may be prompted to run the file or to save it. This guide uses OS X 10.11 El Capitan and Google Chrome. For other operating systems, the options may look slightly different; however, the basic procedure is the same on almost every Mac.
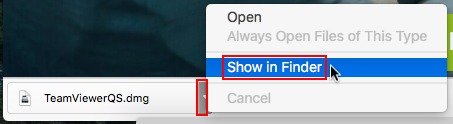
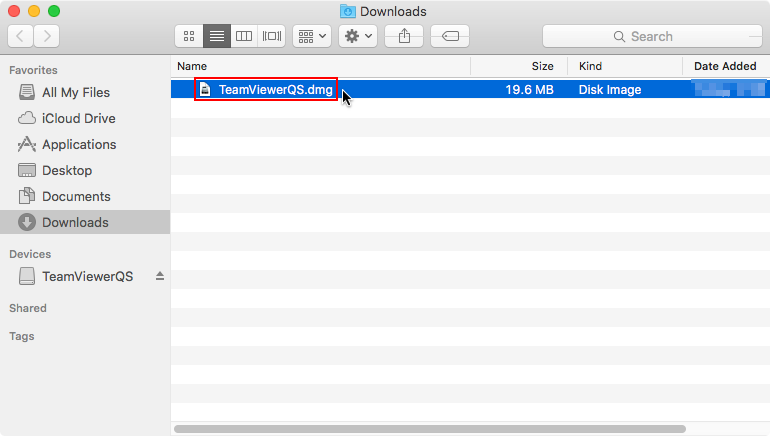
After the download finishes, locate it in the bar at the bottom of the window Click the arrow to the right of the file, and then click Show in Finder.
In the Finder window that appears double-click TeamViewerQS.dmg to open it.
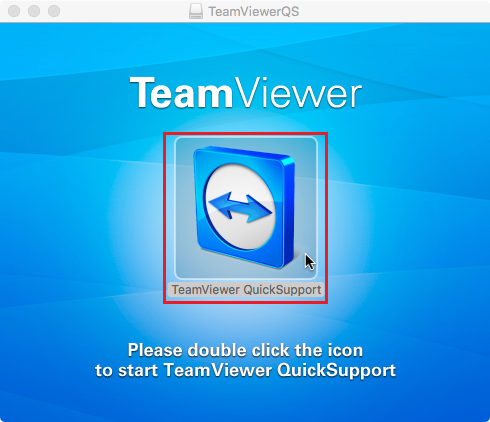
Next, double-click the QuickSupport icon to open it when prompted.
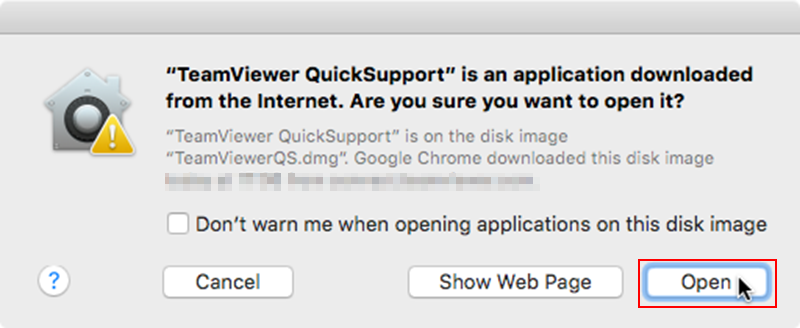
If prompted, click Open to accept the security warning. Provide an administrator password if necessary.
Establishing a TeamViewer Session
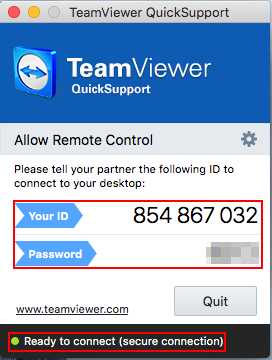
The TeamViewer window will now appear. Note the green light towards the bottom of the window, as well as the status, "Ready to connect (secure connection)." This indicates that TeamViewer is now able to accept an incoming remote support offer.
Make a note of your ID and the four-digit temporary password (obscured), which the support staff will need in order to securely connect to your computer.
Once the support technician has this information, they can take temporary control of your computer. You will be able to see every action they perform. This typically includes seeing the mouse cursor moving, and seeing programs opening and closing. While the technician has control over the mouse and keyboard, you can still override their actions by using the mouse or the keyboard yourself. This is useful when replicating an issue for support staff to resolve, and when you need to enter a password.
If you want to stop a support session in-progress, close TeamViewer. Your technician can also end the session at any time.
Once the remote support session is over, TeamViewer will automatically return control of your computer to you.
Always close TeamViewer once your remote support session is finished. This ensures that no one can access your computer remotely unless TeamViewer is opened again.
Sponsored sessions
When the support session ends, you may see messages promoting the paid edition of TeamViewer. These often appear as a sponsored session message. TeamViewer shows these messages at random because we can provide remote support at no cost to you.
If you see any promotional messages, you can close these windows and continue using your computer, with no further action required.